Ninja Coffee Maker Instruction Manual: A Comprehensive Guide
Welcome! This manual provides detailed instructions for your Ninja coffee maker, ensuring optimal brewing of both hot and iced coffee, alongside specialty options․
Congratulations on choosing a Ninja Coffee Maker! This appliance is designed to deliver a superior coffee experience, offering versatility in brewing styles – from a classic pot to specialty iced coffee and single servings․ The Ninja CM401 and DualBrew Pro CFP300 Series models, among others, combine convenience with advanced features like programmable brewing and dedicated iced coffee settings․
This instruction manual will guide you through every step, from initial setup and understanding the various parts, to mastering brewing techniques and maintaining your coffee maker for years of enjoyment․ Explore the possibilities of the DualBrew system, capable of handling both coffee grounds and single-serve pods․ Prepare to elevate your daily coffee ritual!
Unboxing and Initial Setup
Carefully unpack your Ninja Coffee Maker and verify all components are present․ This includes the coffee maker base, carafe, filter basket, water reservoir, and any included accessories like a frother or sample coffee pods․ Remove all packaging materials, both inside and outside the machine․
Before first use, thoroughly clean all removable parts – the carafe, filter basket, and water reservoir – with warm, soapy water․ Rinse completely․ Place the coffee maker on a stable, level surface․ Fill the water reservoir with fresh, filtered water to the maximum fill line and run a full brewing cycle without coffee grounds to cleanse the system․
Understanding the Parts

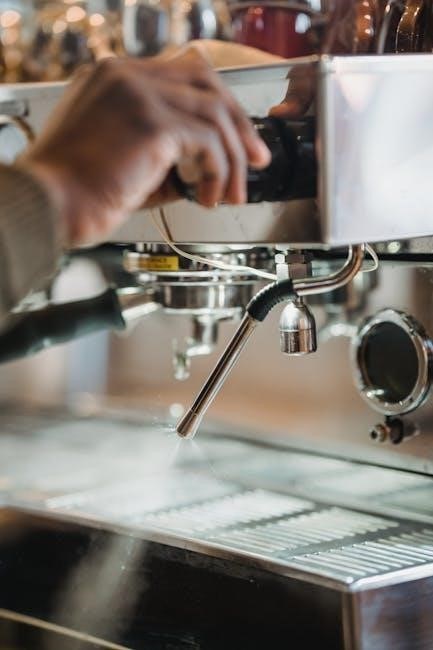
Your Ninja Coffee Maker consists of several key components․ The Carafe and Filter Basket work together to brew and collect your coffee; ensure the filter basket is properly seated․ The Water Reservoir holds the water for brewing, clearly marked with water level indicators․
The Control Panel Overview features buttons for power, brew selection (Classic, Rich, Over Ice), programmable settings, and cleaning cycles․ Familiarize yourself with each button’s function․ Some models include a fold-away frother for specialty beverages․ Understanding these parts will ensure efficient operation and optimal coffee brewing․
Carafe and Filter Basket
The glass carafe is designed for optimal heat retention, keeping your coffee warm for extended periods․ Always ensure it’s clean and free of cracks․ The filter basket accommodates standard paper filters (size #4 typically) or a reusable filter (sold separately)․
Proper filter placement is crucial to prevent grounds from entering the brewed coffee․ Regularly inspect the filter basket for any blockages or damage․ When brewing, ensure the carafe is correctly positioned on the warming plate․ Careful handling of both components will prolong their lifespan and ensure consistently delicious coffee․
Water Reservoir
The water reservoir is a key component, holding the water used for brewing․ It’s typically removable for easy filling and cleaning․ Always use fresh, filtered water for the best-tasting coffee and to minimize scaling․ The reservoir has clear water level markings indicating cup measurements․
Ensure the reservoir is securely seated before starting a brew cycle to prevent leaks․ Do not overfill beyond the maximum fill line․ Regular cleaning of the reservoir is recommended to prevent mineral buildup, which can affect coffee flavor and machine performance․ Refer to the cleaning section for detailed instructions․
Control Panel Overview
The control panel features intuitive buttons for operation․ You’ll find power, brew size selection (cup, travel mug, carafe), and brew style options like Classic, Rich, and Over Ice․ A programmable timer allows for delayed brewing, ensuring fresh coffee is ready when you are․
The panel also includes indicators for cleaning cycles and potential error codes․ Some models feature a ‘Specialty Brew’ button for unique coffee creations․ Familiarize yourself with each button’s function for a seamless brewing experience․ Refer to the ‘Programming’ section for timer setup and the ‘Understanding Error Codes’ section for troubleshooting․
Brewing Coffee: Step-by-Step Instructions
Begin by filling the water reservoir with fresh, filtered water to your desired brew level․ Insert a paper filter into the filter basket, then add your preferred ground coffee․ Ensure the carafe is securely placed on the warming plate․
Select your desired brew size and style using the control panel․ Press the ‘Brew’ button to initiate the brewing process․ The coffee maker will automatically heat the water and brew your coffee․ Once complete, enjoy your freshly brewed coffee! Remember to consult the ‘Specialty Brew Options’ for alternative brewing methods․
Specialty Brew Options
Explore diverse brewing styles with your Ninja coffee maker! The ‘Classic Brew’ delivers a balanced, flavorful cup, perfect for everyday enjoyment․ For a bolder taste, select ‘Rich Brew’, which extracts more flavor from your coffee grounds․
Craving a refreshing iced coffee? Utilize the ‘Over Ice Brew’ setting, designed to compensate for dilution and provide a perfectly chilled beverage․ The DualBrew Pro CFP300 Series offers even more customization․ Experiment with different settings to discover your ideal coffee experience, tailoring each brew to your preferences!
Classic Brew
The Classic Brew setting on your Ninja coffee maker is designed for a consistently smooth and balanced cup of coffee․ This is your go-to option for everyday enjoyment, delivering a familiar and satisfying flavor profile․ Simply add your desired amount of coffee grounds to the filter, fill the water reservoir, and select ‘Classic’ on the control panel․
This setting ensures optimal extraction without over-brewing, resulting in a clean and flavorful result․ It’s perfect for a wide range of coffee blends, providing a reliable and delicious brew every time․ Enjoy!
Rich Brew
The Rich Brew option is perfect for those who prefer a bolder, more intense coffee experience․ This setting utilizes a slightly slower brewing process and increased water contact time, extracting more flavor and aroma from your coffee grounds․ To use, simply select ‘Rich’ on the control panel after adding grounds and water․
Ideal for darker roasts or when you desire a particularly robust cup, the Rich Brew delivers a full-bodied flavor that’s sure to awaken your senses․ It’s a fantastic choice for those who enjoy a strong, satisfying coffee․
Over Ice Brew
The Over Ice Brew function is specifically designed to create flavorful iced coffee without the watered-down taste often associated with pouring hot coffee over ice․ This setting brews a concentrated coffee directly over ice, preserving the coffee’s strength and richness․
To utilize this feature, fill the carafe with ice to the designated fill line, and select ‘Over Ice’ on the control panel․ The Ninja coffee maker will automatically adjust the brewing parameters to compensate for the ice, resulting in a perfectly chilled and flavorful iced coffee․ Enjoy a refreshing beverage!
Programming the Coffee Maker
Programming your Ninja Coffee Maker allows for automated brewing, ensuring a fresh pot is ready when you wake up or return home․ Access the ‘Program’ function on the control panel․ You’ll then set the desired brew time, choosing the hour and minute․
Next, select your preferred brew type – Classic, Rich, or Over Ice․ Confirm your settings, and the coffee maker will remember them․ To disable the programmed brew, simply press the ‘Program’ button again or select a different brew option․ Enjoy the convenience of scheduled brewing!
Cleaning and Maintenance
Regular cleaning is crucial for maintaining your Ninja Coffee Maker’s performance and longevity․ Always unplug the unit before cleaning․ Removable parts, like the carafe and filter basket, are dishwasher safe․ Wipe down the exterior with a damp cloth․
Descaling should be performed regularly, especially if you have hard water․ Use a descaling solution following the manufacturer’s instructions, running a full brew cycle with the solution, then rinsing with several cycles of fresh water․ This removes mineral buildup, ensuring optimal brewing․
Descaling Process
Descaling removes mineral buildup impacting brew time and coffee flavor․ Mix a descaling solution (vinegar or commercial descaler) with water, following the solution’s instructions․ Pour the mixture into the water reservoir․ Place the carafe in position․

Initiate a full brew cycle without coffee grounds․ After brewing, discard the solution․ Run 2-3 full brew cycles with fresh water only to thoroughly rinse the system․ Repeat if necessary, ensuring no descaling solution remains․ Regular descaling, every 3 months, maintains peak performance․
Cleaning Removable Parts
Regular cleaning ensures fresh-tasting coffee and prolongs your Ninja’s lifespan․ The carafe, filter basket, and water reservoir are dishwasher safe (top rack recommended)․ Hand wash the frother (if applicable) with warm, soapy water․
For stubborn stains, use a non-abrasive cleaner․ Rinse all parts thoroughly with clean water before reassembling․ Wipe down the exterior of the coffee maker with a damp cloth․ Avoid immersing the main unit in water․ Consistent cleaning prevents residue buildup and maintains optimal brewing conditions․
Troubleshooting Common Issues
If your Ninja coffee maker won’t turn on, check the power cord and outlet․ Ensure the water reservoir is properly seated․ Slow brewing often indicates mineral buildup – descaling (see cleaning section) is recommended․ If coffee overflows, avoid overfilling the filter basket․

For error codes, consult the “Understanding Error Codes” section․ If issues persist, unplug the unit and contact customer support․ Never attempt to disassemble or repair the coffee maker yourself, as this voids the warranty․ Regular maintenance prevents many common problems․
Coffee Maker Not Turning On
If your Ninja coffee maker fails to power on, first verify the power cord is securely plugged into a functioning electrical outlet․ Test the outlet with another device to confirm it’s providing power․ Ensure the water reservoir is correctly positioned; a misaligned reservoir can prevent operation․
Check the on/off switch and any programmed settings․ If the issue continues, unplug the unit for several minutes, then plug it back in․ If still unresponsive, contact Ninja’s customer support for assistance, referencing your model number․
Coffee Brewing Too Slowly
If your Ninja coffee maker is brewing exceptionally slowly, the most common cause is mineral buildup․ This restricts water flow, impacting brew time․ Initiate the descaling process as outlined in the ‘Cleaning and Maintenance’ section of this manual․ Ensure the filter basket isn’t overfilled with coffee grounds, as this can also impede water flow․
Additionally, verify the carafe is properly positioned on the warming plate․ A misaligned carafe can disrupt the brewing cycle․ If the problem persists after descaling and adjusting the grounds, contact Ninja support for further troubleshooting․
Using the Fold-Away Frother (If Applicable)
If your Ninja model includes a fold-away frother, it allows you to create rich, creamy foam for lattes and cappuccinos․ To use, ensure the frother is securely unfolded and positioned over a suitable container․ Fill with your desired amount of milk – whole milk generally produces the best results․
Activate the frother using the designated button on the control panel․ The frother will automatically heat and froth the milk․ Once complete, carefully remove the container․ Clean the frother immediately after each use to prevent milk residue buildup․ Refer to the ‘Cleaning and Maintenance’ section for detailed cleaning instructions․
Understanding Error Codes
Your Ninja coffee maker utilizes error codes to indicate specific issues․ If an error code appears on the display, consult this guide for troubleshooting․ “E1” typically signals a water reservoir issue – ensure it’s properly filled and seated․ “E2” often indicates a blockage in the brewing path; descaling may be required․
“E3” can mean a carafe problem – verify it’s correctly positioned․ Other codes may relate to temperature sensor malfunctions or internal system errors․ If an error persists after attempting troubleshooting, disconnect the coffee maker and contact Ninja customer support for assistance․ Do not attempt to repair the unit yourself․
Safety Precautions
Always operate your Ninja coffee maker on a stable, level surface․ Avoid using extension cords․ Never immerse the appliance in water or other liquids․ Keep the cord away from hot surfaces․ Do not operate the coffee maker if the cord or plug is damaged․
Hot surfaces can cause burns – exercise caution when handling the carafe and during brewing․ Unplug the appliance when not in use and before cleaning․ Allow the coffee maker to cool completely before disassembling․ This appliance is for household use only; avoid commercial applications․ Supervise children when near the appliance․
Warranty Information
Your Ninja Coffee Maker is warranted against defects in materials and workmanship for a period of one year from the date of purchase․ This warranty covers normal household use․ Damage resulting from misuse, abuse, or unauthorized repairs is not covered․ To obtain warranty service, proof of purchase is required․
Please visit our website or contact customer support for detailed warranty terms and conditions․ The warranty does not cover incidental or consequential damages․ This warranty gives you specific legal rights, and you may have other rights which vary by location․ Register your product online to expedite any future warranty claims․
Downloading the User Manual (PDF)
For convenient access to the complete Ninja Coffee Maker instruction manual, a downloadable PDF version is readily available on our official website․ This digital copy allows you to easily reference brewing guides, cleaning instructions, and troubleshooting tips at any time, from any device․
Simply navigate to the support section of our website and locate your specific model number (e․g․, CM401, CFP300)․ Click the corresponding link to download the PDF․ Having a digital copy ensures you always have the latest information at your fingertips, even without an internet connection․
Frequently Asked Questions (FAQ)
Do I need to use a paper filter with the reusable filter basket? While a paper filter isn’t required, using one can result in a cleaner brew․ Can I brew directly into a travel mug? Yes, adjust the carafe platform to accommodate most standard travel mug sizes․ How often should I descale my Ninja Coffee Maker? We recommend descaling every three months, or more frequently if you have hard water․
What does the “Clean” light indicate? It’s a reminder to initiate the cleaning cycle․ Where can I find replacement parts? Visit our website or authorized retailers․
Where to Find Additional Support
For comprehensive assistance with your Ninja Coffee Maker, our dedicated support team is readily available․ Visit our official website for an extensive knowledge base, including troubleshooting guides, frequently asked questions, and downloadable user manuals in PDF format․ You can also access helpful video tutorials demonstrating various features and maintenance procedures․
Need to speak with a representative directly? Contact our customer care hotline during business hours․ Furthermore, explore our online community forums where users share tips and solutions․ Don’t forget to check for updates and support resources on our social media channels!