
Medela Pump In Style Advanced User Manual: A Comprehensive Guide
Welcome! This manual provides detailed instructions for the Medela Pump In Style Advanced, a double electric breast pump designed for efficient and comfortable milk expression․
It covers setup, operation, cleaning, troubleshooting, and essential safety information, ensuring optimal performance and longevity of your Medela product․
The Medela Pump In Style Advanced is a highly regarded, hospital-proven breast pump designed to meet the needs of modern mothers․ Launched in June 2025, it builds upon Medela’s legacy as a trusted brand, consistently ranked #1 in hospitals․ This pump offers efficient and comfortable milk expression, utilizing Medela’s renowned 2-Phase Expression Technology․
This double electric pump is particularly valued for its portability, often packaged in the convenient Metro Bag․ It’s designed for mothers seeking a reliable and discreet pumping solution, whether returning to work or simply managing their breastfeeding journey․ The Pump In Style Advanced is compatible only with Medela recommended parts, ensuring optimal performance and safety․
Before first use, carefully review this user manual to understand all features and safety precautions․
Understanding the Key Features
The Medela Pump In Style Advanced boasts several key features designed for optimal pumping experience․ Central to its functionality is the 2-Phase Expression Technology, mimicking a baby’s natural sucking pattern to stimulate let-down and efficiently express milk․ Adjustable suction levels and cycle speed control allow for personalized comfort and effectiveness․
The pump’s portability is enhanced by the included Metro Bag, making discreet pumping on-the-go convenient․ It’s crucial to use only Medela-recommended parts, like the tubing, faceplate, and diaphragm, to maintain performance and safety․ The pump operates via both battery and AC adapter power sources․
Detailed instructions for use are available, and Medela provides extensive online resources and customer support․
What’s Included in the Box?
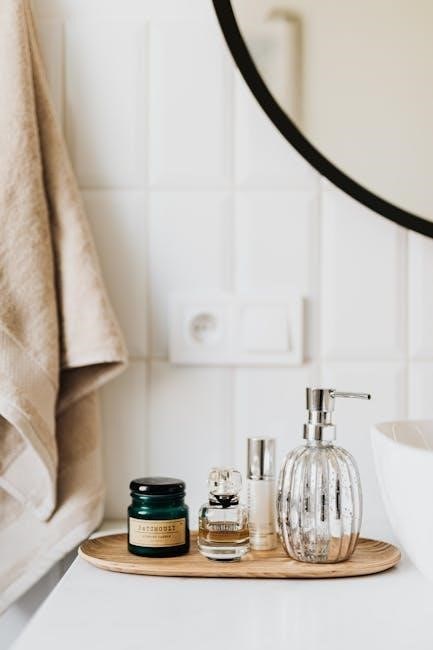
Upon opening your Medela Pump In Style Advanced, you should find several components․ The core of the system includes the pump motor unit itself, along with two breastshields – ensuring double pumping capability․ Two connection tubes are provided to link the breastshields to the motor․ Also included are two lids, often with model number 101041360, for hygienic milk storage․
The convenient Metro Bag is a key inclusion, facilitating portability and discreet pumping․ A power adapter allows for AC operation, while battery compatibility offers flexibility․

Please note a manual breast pump may also be included, alongside essential parts like tubing and diaphragms․ Verify all components are present before first use․
Safety Precautions and Warnings
Important Safety Information: Always read this entire instruction manual before operating the Medela Pump In Style Advanced․ Only utilize Medela-recommended parts to maintain pump integrity and safety․ Never modify the pump in any way․ Do not use the branded textile loop to carry the pump on your body – it’s designed for storage, not wear․
Inspect all components for damage before each use․ Discontinue use if any parts are cracked or show signs of wear․ Ensure electrical components remain dry․ This device is intended for personal use only; sharing may pose hygiene risks․
Keep the pump and accessories out of reach of children․ Follow cleaning and sterilization guidelines diligently to prevent bacterial contamination․
Setting Up Your Pump
Preparation is Key: Begin by unpacking all components from the box and familiarizing yourself with each part․ Ensure you have the motor unit, breastshields, tubing, connectors, and power adapter․ Before first use, thoroughly wash your hands․ Place the motor unit on a clean, flat surface․

Locate the tubing connectors and gently attach them to the ports on the motor unit․ Ensure a secure fit, but avoid excessive force․ The breastshields will connect to the other end of the tubing – this will be covered in the next step․ Verify the power adapter is compatible with your local voltage before connecting it․
Connecting the Tubing and Breastshield
Secure Connections: Carefully attach the open ends of the tubing to the stems of the breastshields․ A gentle click usually indicates a secure connection․ Ensure the tubing isn’t kinked or twisted, as this can impede milk flow․ The faceplate and diaphragm should already be correctly assembled within the breastshield assembly․
Double-check all connections – tubing to motor unit and tubing to breastshields – to prevent air leaks during operation․ Proper connection is vital for efficient pumping․ Refer to the diagrams in this manual for visual guidance․ Only use Medela recommended parts to maintain pump performance and safety․
Powering the Pump: Battery and AC Adapter
Versatile Power Options: The Medela Pump In Style Advanced offers flexibility with both battery and AC adapter power sources․ To use batteries, insert eight AA batteries into the battery compartment, ensuring correct polarity (+/-)․ The pump will operate on battery power until the batteries are depleted․
Alternatively, connect the provided AC adapter to a standard electrical outlet and the pump’s power port․ Using the AC adapter is recommended for extended pumping sessions․ Always disconnect the AC adapter when not in use․ Do not operate the pump with damaged cords or outlets․
Initial Cleaning and Sterilization
Essential First Steps: Before your first use, thoroughly clean and sterilize all parts that come into contact with breast milk․ This includes the breastshields, connectors, tubing (follow Quick Clean instructions), bottles, and lids․ Wash all components with warm, soapy water, rinsing thoroughly․
Sterilization Methods: Sterilize by boiling for five minutes, using a steam sterilizer, or following the manufacturer’s instructions for a microwave steam bag․ Ensure all parts are completely dry before assembly․ Proper initial cleaning and sterilization are crucial for maintaining hygiene and preventing contamination, safeguarding your baby’s health․
Operating the Pump: A Step-by-Step Guide
Getting Started: Ensure the pump is assembled correctly with the tubing securely connected to both the motor unit and the breastshields․ Power on the pump using either batteries or the AC adapter․ Begin with the lowest suction level and cycle speed․
Initiating Pumping: Center the breastshield over your nipple, ensuring a comfortable fit․ Press the ‘Start’ button to activate the 2-Phase Expression technology․ Adjust suction and cycle speed to your comfort level, mimicking your baby’s natural nursing pattern․ Monitor milk flow and adjust settings as needed for optimal expression․
Phase Expression Technology Explained
Medela’s innovative 2-Phase Expression Technology mimics a baby’s natural sucking pattern, maximizing milk flow and comfort․ Phase 1, the stimulation phase, features fast, light suction to initiate let-down – triggering your body’s milk ejection reflex․ This phase encourages milk to move from the milk ducts․
Phase 2, the expression phase, provides a slower, more intense suction to efficiently extract milk․ The pump automatically switches between these phases, or you can customize them manually․ This technology promotes faster, more complete milk removal, and a more comfortable pumping experience for mothers․
Adjusting Suction Levels
Proper suction is crucial for comfortable and effective pumping․ Begin with the lowest suction level and gradually increase it until you feel a comfortable pulling sensation – not pain․ Higher suction isn’t always better; find the level that maximizes milk flow without causing discomfort․
The Pump In Style Advanced allows for precise suction control․ Use the control buttons to adjust the suction intensity․ Pay attention to your body’s signals․ If you experience pain, reduce the suction immediately․ Remember, individual comfort levels vary, so personalize the settings to suit your needs․ Consistent, comfortable suction promotes optimal milk expression․
Cycle Speed Control
Cycle speed, or pumping rate, refers to how many times per minute the pump mimics a baby’s sucking pattern․ The Medela Pump In Style Advanced offers adjustable cycle speeds to mimic your baby’s natural rhythm and optimize milk flow․ Start with a faster speed for initial stimulation, then slow it down once milk begins to flow․
Experiment with different speeds to find what’s most comfortable and effective for you․ Some mothers prefer a slower, more gentle cycle, while others respond better to a faster pace․ Utilize the control buttons to easily adjust the cycle speed during pumping sessions․ Finding the right speed enhances comfort and maximizes milk expression․
Using the Pump: Pumping Techniques
Effective pumping relies on proper technique․ Begin by ensuring a comfortable and relaxed position․ Initiate pumping with the stimulation mode, gradually increasing suction as your breasts respond․ Avoid using the highest suction level immediately, as this can cause discomfort․
Focus on relaxation – deep breathing and visualization can aid milk let-down․ Consider massaging your breasts gently before and during pumping to encourage flow․ Remember, every woman is different; experiment to discover what works best for you․ Consistent, comfortable pumping sessions yield optimal results․
Proper Breastshield Fit
Achieving a correct breastshield fit is crucial for comfortable and efficient pumping․ The nipple should move freely within the tunnel, without rubbing against the sides․ Too small a flange causes pain and restricted flow; too large creates a poor seal and reduces suction․
Medela offers various flange sizes; utilize the included fit kit or consult a lactation consultant to determine your ideal size․ Observe your nipple after pumping – redness or soreness indicates an improper fit․ A comfortable fit maximizes milk expression and minimizes discomfort․ Regularly assess the fit, as breast size can fluctuate․
Positioning for Optimal Milk Flow
Optimal positioning significantly impacts milk expression․ Sit comfortably in a relaxed position, leaning slightly forward․ This helps utilize gravity to aid milk flow; Ensure your back is supported․
Avoid reaching or straining; bring the breastshields to you, not vice versa․ Gently compress the breast tissue with your hand, creating a “C” shape, to encourage milk ducts to open․ Visualize your baby nursing – this can trigger a let-down reflex․ Experiment with different positions to find what works best for you․ Relaxation is key; stress can inhibit milk flow․
Maximizing Milk Expression
To maximize milk expression, begin with a stimulation phase using lower suction levels to initiate let-down․ Once milk flow starts, gradually increase the suction to a comfortable, yet effective, level․ Utilize the 2-Phase Expression technology, mimicking a baby’s natural nursing pattern․
Consider breast massage during pumping to further stimulate milk ducts․ Visualize your baby or look at pictures/videos – this can enhance let-down․ Ensure proper breastshield fit; an incorrect size can hinder milk flow․ Pump for a sufficient duration, even after flow slows, to ensure complete emptying․ Hydration and nutrition also play a vital role․
Cleaning and Maintenance
Regular cleaning is crucial for hygiene and pump longevity․ After each use, disassemble all parts that come into contact with breast milk․ Wash these components with warm, soapy water, ensuring thorough rinsing․ Utilize the Quick Clean microwave steam bags for convenient daily cleaning․
For deep cleaning and sterilization, boil the parts for five minutes or use a sterilizer․ Inspect tubing for cracks or damage; replace as needed․ The motor unit should be wiped clean with a damp cloth – avoid immersing it in water․ Store all parts dry and separately to prevent contamination․
Daily Cleaning Procedures
Following each pumping session, immediately disassemble the breastshield, valves, membranes, bottles, and tubing connections․ Wash all parts with warm, soapy water, paying close attention to crevices where milk residue can accumulate․ Rinse thoroughly under running water to remove all soap traces․
Medela’s Quick Clean Microwave Steam Bags offer a convenient daily cleaning solution – simply follow the bag’s instructions․ Ensure all parts are completely dry before reassembling and storing․ Proper daily cleaning prevents bacterial growth and maintains optimal pump performance․ Do not use abrasive cleaners or harsh chemicals․

Deep Cleaning and Sterilization
For thorough hygiene, perform a deep cleaning and sterilization weekly, or more frequently if needed․ After disassembly and washing with soap and water, sterilize the breastshield, valves, membranes, bottles, and tubing connectors․ Boiling for five minutes is an effective method; ensure parts don’t touch the bottom of the pot․
Alternatively, utilize the Medela Steam Sterilizer Bags or a dedicated sterilizer․ Allow all components to air dry completely on a clean surface before reassembly․ Sterilization eliminates potential bacteria and ensures a hygienic pumping experience․ Always refer to the instruction manual for specific component sterilization guidelines․
Replacing Pump Parts
Regular replacement of pump parts is crucial for maintaining optimal suction and hygiene․ Medela recommends replacing breastshields every three months, valves and membranes every six months, and tubing every six to twelve months, depending on usage․ Worn parts can compromise suction, leading to reduced milk output and potential bacterial growth․
Only use Medela-recommended replacement parts to ensure compatibility and performance․ Inspect parts regularly for cracks, tears, or discoloration․ Prompt replacement safeguards your milk supply and ensures a comfortable, efficient pumping experience․ Refer to the manual for specific part numbers and ordering information․
Troubleshooting Common Issues
Experiencing problems? This section addresses frequent concerns․ Pump not turning on? Ensure the power adapter is securely connected or batteries are fresh․ Low suction? Check tubing connections, valve/membrane seating, and breastshield fit․ Inspect for blockages or wear․ Milk flow problems? Adjust suction levels, verify proper flange size, and ensure correct positioning․

If issues persist, consult the full instruction manual or Medela’s online resources․ Avoid disassembling the motor unit․ Proper maintenance and timely part replacement often resolve common issues․ Remember to always prioritize hygiene and safety when troubleshooting․
Pump Not Turning On
Is your Pump In Style Advanced failing to power on? First, verify the AC adapter is firmly plugged into both the pump and a working electrical outlet․ If using batteries, ensure they are correctly installed and have sufficient charge – replace if necessary․ Check the power button is fully engaged․
If the pump still doesn’t respond, inspect the tubing connections; a loose connection can sometimes prevent operation․ Consult the instruction manual for specific troubleshooting steps․ Do not attempt to disassemble the motor unit․ Contact Medela customer service if the problem persists, as internal issues may require professional attention․
Low Suction

Experiencing reduced suction with your Pump In Style Advanced? Begin by checking the tubing for any kinks, cracks, or blockages – replace if damaged․ Ensure the breastshield is properly connected to both the tubing and the pump unit, forming a secure seal․ Verify the diaphragm is correctly positioned and not worn or damaged; this component is crucial for suction․
Adjust the suction level using the control buttons․ If suction remains low, inspect the faceplate․ Refer to the manual for detailed diagrams․ If issues persist, contact Medela support; low suction can hinder effective milk expression․
Milk Flow Problems
Encountering difficulties with milk flow during pumping? First, confirm proper breastshield fit – it shouldn’t be too tight or loose․ Ensure correct positioning, as optimal positioning maximizes milk expression․ Verify the pump’s settings; experiment with different phase and suction levels to find what works best for you․
Check tubing connections for leaks or blockages․ If flow remains slow, gently massage your breasts to encourage let-down․ Review the manual for troubleshooting tips․ If problems continue, consult with a lactation consultant or Medela customer service for personalized guidance․
Understanding the Metro Bag
The Metro Bag is specifically designed to carry and protect your Medela Pump In Style Advanced․ It’s a stylish and practical solution for moms on the go, offering convenient portability․ The bag features a dedicated compartment for the pump motor and tubing, keeping them secure and separate from other items․

It also includes space for bottles, accessories, and personal belongings․ The insulated interior helps maintain milk temperature during transport․ The Metro Bag is designed for discreet and comfortable carrying, making pumping easier whether you’re at work, traveling, or simply out and about․
Features of the Metro Bag
The Medela Pump In Style Advanced Metro Bag boasts several key features enhancing usability․ It includes a fully insulated interior, maintaining optimal breast milk temperature for extended periods․ A dedicated, padded compartment securely holds the pump motor, tubing, and power adapter, preventing damage during transit․
Additionally, the bag offers ample space for bottles, storage containers, and personal items․ A detachable shoulder strap and comfortable carry handle provide versatile carrying options․ The stylish design blends seamlessly with everyday fashion, offering discretion․ Furthermore, the wipeable interior ensures easy cleaning and maintenance, making it a practical choice for busy mothers․
Proper Storage of Pump and Accessories
To ensure the longevity and hygiene of your Medela Pump In Style Advanced, proper storage is crucial․ After each use, thoroughly clean and dry all components before storing․ Store the pump motor, tubing, and breastshields in a clean, dry location, away from direct sunlight and extreme temperatures․

The Metro Bag provides an ideal storage solution, protecting the pump from dust and damage․ Keep replacement parts, such as diaphragms and valves, in a sealed container․ Regularly inspect all parts for wear and tear, replacing them as needed․ Following these guidelines will maintain optimal pump performance and prevent contamination․
Traveling with Your Pump In Style Advanced
Traveling with your Medela Pump In Style Advanced is convenient with its compact design and versatile power options․ Always pack the pump and accessories in a dedicated carry bag, like the Metro Bag, to protect them during transit․ Consider bringing extra batteries for uninterrupted use, especially during flights․
Check TSA guidelines regarding breast pumps and breast milk for security screening procedures․ You may need to declare the pump and explain its purpose․ Ensure all components are clean and dry before packing to prevent contamination․ Familiarize yourself with power adapter compatibility at your destination․ Proper preparation ensures a stress-free pumping experience while traveling․
Medela Resources and Support
Medela offers extensive resources to support your pumping journey․ Access comprehensive instruction manuals for all Medela breast pumps and accessories, including the Pump In Style Advanced, directly on their website․ These guides provide detailed information on operation, cleaning, and troubleshooting․
For personalized assistance, Medela provides dedicated customer service via phone and online channels․ Their knowledgeable representatives can address specific questions and concerns․ Explore the Medela website for frequently asked questions (FAQ), helpful articles, and lactation support resources․ Medela is committed to empowering mothers with the information and support they need for successful breastfeeding and pumping․
Accessing Online Manuals
Medela makes accessing your Pump In Style Advanced user manual incredibly convenient․ Visit the official Medela website to find a dedicated support section containing digital versions of all product manuals․ You can easily search for your specific model – the Pump In Style Advanced – and download the instruction guide in PDF format․
These online manuals often include enhanced features like searchable text and interactive diagrams․ Medela also provides instructions for other products like the Swing Maxi and Freestyle pumps․ Having a digital copy allows for quick reference on your computer, tablet, or smartphone, ensuring you always have the information you need at your fingertips․
Contacting Medela Customer Service
Medela offers comprehensive customer support to assist with any questions or concerns regarding your Pump In Style Advanced․ For immediate assistance, visit the Medela website, which features a detailed FAQ section and troubleshooting guides․ You can also connect with a customer care representative through their online chat function during business hours․
Alternatively, you can reach Medela customer service directly by phone․ Their dedicated team is equipped to provide personalized support, address technical issues, and guide you through the proper use and maintenance of your breast pump․ Don’t hesitate to contact them for warranty inquiries or to report any product concerns․
Warranty Information
Medela stands behind the quality and performance of the Pump In Style Advanced with a limited warranty․ This warranty typically covers defects in materials and workmanship under normal use for a specified period, often one year from the date of purchase․ Please retain your proof of purchase, as it is required for all warranty claims․
The warranty does not cover damage resulting from misuse, accidents, unauthorized repairs, or normal wear and tear․ To initiate a warranty claim, contact Medela customer service with your purchase details and a description of the issue․ Medela will assess the claim and, if valid, provide repair or replacement options․
Frequently Asked Questions (FAQ)
Q: Can I use parts from other breast pump brands with my Pump In Style Advanced? A: No, always use Medela-recommended parts to ensure proper function and safety․ Using non-Medela parts may void your warranty․
Q: How often should I replace the diaphragm? A: Medela recommends replacing the diaphragm approximately every three months, or sooner if it shows signs of wear․
Q: Where can I find additional support and resources? A: Visit the Medela website for online manuals, FAQs, and troubleshooting guides․ You can also contact Medela customer service for personalized assistance․