
Lifetime Shed Assembly: A Comprehensive Guide (Based on 12/06/2025 Information)
Today’s date is 12/06/2025 05:08:14 ()․ Assembling hundreds of these sheds reveals success hinges on a level base and panel pliability, requiring patience and a helper․
Welcome to the comprehensive guide for assembling your Lifetime shed, current as of December 6th, 2025․ This guide is born from extensive experience – having assembled hundreds of these units, both for in-store displays at Sam’s Club and through direct customer delivery and installation services․ Successfully building a Lifetime shed isn’t necessarily difficult, but it demands a strategic approach and understanding of the material’s unique characteristics․
The process requires patience, a keen eye for alignment, and a willingness to adapt․ Unlike traditional shed construction, Lifetime sheds rely on interlocking panels and a specific assembly order․ A slightly uneven ground can be overcome, but preparation is key․ Crucially, the plastic panels require a balance between warmth and flexibility; too cold, and they’re brittle, too warm, and they become unwieldy․ This guide will navigate you through each phase, offering insights gleaned from countless builds, ensuring a structurally sound and aesthetically pleasing result․
Understanding the Challenges
Assembling a Lifetime shed presents unique challenges stemming from its plastic construction․ The primary hurdle lies in achieving squareness and rigidity throughout the build․ Unlike wood, the panels aren’t inherently stable and require constant adjustment during assembly – twisting, poking, and prodding are often necessary to ensure proper alignment․ Stripped screw holes are a common frustration, a consequence of the material’s flexibility and the potential for overtightening․
Furthermore, the shed’s structure flexes considerably until the roof is installed, making it feel unstable during intermediate stages․ Maintaining even pressure and avoiding forcing connections are vital․ The panels’ temperature sensitivity adds another layer of complexity; optimal pliability is crucial for a smooth fit․ Finally, the sheer size of the components often necessitates a second person, particularly during roof installation, to manage weight and ensure accurate positioning․ Recognizing these challenges upfront prepares you for a more successful build․
Tools Required for Assembly
Successful Lifetime shed assembly demands a specific toolkit, though it’s surprisingly minimal․ A Phillips head screwdriver is essential, and while a power drill with a Phillips head bit significantly speeds up the process, caution is advised – use a low torque setting or practice manual screw insertion to avoid stripping holes․ A rubber mallet proves invaluable for gently persuading panels into alignment, while a level ensures a stable foundation․
Beyond these core tools, a measuring tape aids in precise positioning, and shims are highly recommended, particularly for door hinge cup installation, ensuring proper height for cotter pin access․ A block of wood (often included with the shed) is crucial for window panel support․ Finally, having a utility knife handy for opening packaging and potentially trimming excess material can be beneficial․ Prioritizing a slow, controlled approach over brute force is key, regardless of tool choice․
Preparing the Assembly Area
Proper site preparation is paramount for a smooth Lifetime shed build․ Begin by selecting a location that is as level as possible; minor imperfections can be addressed with shims later, but significant slopes will create major headaches․ Clear the area of all debris – rocks, roots, and vegetation – to protect the shed floor panels․ A smooth, firm surface is ideal, preventing uneven stress and potential warping․
Ensure ample workspace around the perimeter of the intended shed footprint, allowing for easy maneuvering of panels and tools․ Consider laying down a protective tarp or cardboard to prevent scratching the panels during assembly․ Finally, organize all shed components and hardware, referencing the parts list to confirm everything is present․ Remember, a well-prepared area translates directly into a less frustrating and more efficient assembly experience․
Step-by-Step Assembly Process
Follow a logical sequence: floor, gables (vents/screens included), doors, trusses, then walls, carefully aligning panels and utilizing provided hardware for secure connections․
Phase 1: Foundation and Floor
Establishing a solid foundation is paramount for a successful Lifetime shed assembly․ Ensure the ground is as level and smooth as possible; minor imperfections can be addressed during floor panel installation, but significant slopes will create major issues later․ Begin by laying out the floor panels according to the instructions, paying close attention to the orientation of each piece․
Remember, the panels require a degree of warmth and flexibility to properly interlock – avoid assembly on extremely cold days․ As you position each panel, gently twist and prod to encourage a snug fit, ensuring all edges are flush․ This initial phase sets the stage for the entire structure, so accuracy is key․ Prioritize getting this right before moving forward․
Installing the Floor Panels
Careful floor panel installation is crucial for a square and stable shed base․ Lay out the panels, referencing the manual for correct orientation, and begin snapping the panels together․ Remember the need for panel warmth and pliability; a slight temperature increase can aid in easier connection․ Don’t force anything – gentle persuasion and slight adjustments are preferred․
As you connect each panel, immediately check for squareness․ Use a measuring tape to confirm diagonal measurements are equal․ This early correction prevents compounding errors later․ Before securing with screws, ensure all edges align perfectly․ The floor tie is vital; snap all four tabs of each panel into the floor, linking to the previous panel with 4-5 screws, maintaining an even top surface․
Securing Floor Panels with Screws
Proper screw installation is paramount, but avoid overtightening! Practice beforehand, either by hand or with a drill on a very slow setting, to gauge the appropriate pressure․ Stripped holes are a common frustration during Lifetime shed assembly, so finesse is key․ As you secure the floor panels, work systematically, ensuring each screw is flush but not digging into the plastic․
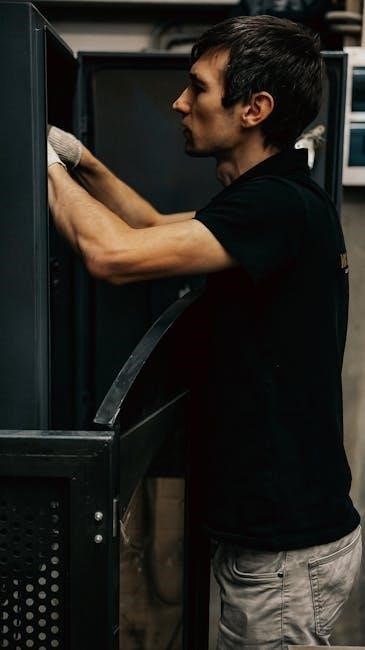
Remember the entire structure flexes and moves during this phase․ Don’t assume perfect alignment initially; the shed will settle as more panels are connected․ Focus on creating a solid connection at each joint, but be prepared to make minor adjustments later․ The block of wood provided is essential – use it to support panels during screwing, ensuring a stable connection․ A second person can be incredibly helpful in holding panels steady while you drive the screws․

Phase 2: Gable Assembly & Installation

Gable assembly precedes installation, including attaching vents and screens․ This step requires careful attention to detail, ensuring proper alignment for future stability․ Once assembled, the gables are positioned onto the floor, demanding precision to maintain squareness․ Remember the panels need to be warm and pliable, but not overly soft, to facilitate a smooth fit․
Don’t hesitate to “twist and poke and prod” the panels to achieve a snug, square connection․ This is where a second person proves invaluable, assisting with alignment and support․ Secure the gables to the floor, remembering to account for the door hinge cup height – shims under the cups during floor laying can ensure proper cotter pin installation later․ This phase sets the foundation for the roof, so accuracy is crucial․
Assembling the Gable Frames
Prior to installation, meticulously assemble the gable frames․ This involves connecting the various panel sections to form the triangular gable ends of the shed․ Ensure each connection is secure, utilizing the provided screws and following the diagram in the assembly manual․ Remember, the success of the entire structure relies on the accuracy of this initial framing․
Pay close attention to the orientation of the panels, as incorrect placement can lead to issues later in the process․ Simultaneously with frame assembly, integrate the vents and screens, ensuring they are properly seated within the designated openings․ A second person can be incredibly helpful in holding panels steady during this stage․ The goal is to create two robust, identically formed gable frames ready for attachment to the floor․

Attaching Vents and Screens to Gables
Integrating vents and screens into the gable frames is crucial for airflow and pest control․ Before fully assembling the gables, carefully position the vent and screen components into their designated slots․ Ensure a snug fit, as these elements contribute to the shed’s overall weather resistance․ The provided instructions will detail the specific orientation and securing method for each component․
Take your time during this step; forcing the pieces can damage the plastic․ Remember the advice about panel pliability – a slightly warm environment can make this process easier․ Secure the vents and screens using the appropriate screws, avoiding overtightening․ A helper can hold the frame steady while you work, ensuring accurate placement․ Properly installed vents and screens are essential for maintaining a comfortable and protected storage environment within the Lifetime shed․
Installing Gable Frames to the Floor
Securing the gable frames to the floor is a pivotal step, establishing the shed’s structural integrity․ Before attaching, double-check the floor panel alignment and ensure it’s as square as possible․ Position the gable frames carefully, aligning them with the edges of the floor panels․ Remember the earlier advice about shims under the door hinge cups – this principle applies here too, ensuring proper height for later cotter pin installation․
Utilize the provided screws to firmly attach the gable frames to the floor․ Work systematically, starting with one corner and gradually moving around the perimeter․ Don’t overtighten initially; allow for some flexibility as you connect subsequent panels․ This stage is where the structure begins to feel more substantial, but remember it will still flex until the roof is installed․ A second person is invaluable for holding the frames steady during this process, ensuring a secure and accurate connection․
Phase 3: Wall Construction
Layout walls in assembly order, starting with the right front corner, proceeding around the perimeter back to the left front door corner․
Laying Out Wall Panels
Careful wall panel layout is crucial for a square and stable shed․ Begin by arranging the panels in the order they will be assembled, typically starting with the right front corner and moving sequentially around the perimeter․ This methodical approach minimizes adjustments later․ Before securing anything, ensure the panels align properly, paying close attention to the pre-drilled holes and interlocking edges․
Window placement is a key decision at this stage․ Consider visibility and accessibility when choosing the window’s location․ Utilize the provided wood block to support the window panel, ensuring it’s level and secure․ Remember to snap all four tabs of each panel firmly into the floor before proceeding․ Connect each panel to the previous one using all available screws, verifying the top edges remain even throughout the process․ This foundational step sets the stage for a successful wall construction․
Choosing Window Placement
Strategic window placement significantly impacts the shed’s functionality and aesthetics․ Consider the intended use of the shed when deciding where to position the window; think about visibility, natural light, and ventilation․ Ensure the chosen location doesn’t compromise structural integrity or interfere with internal storage․ Prioritize a spot that allows for easy access and a clear view of the surrounding area․
Utilize the provided wood block for optimal window support․ This block ensures the window panel remains level and secure during assembly․ Remember to snap all four tabs of the window panel firmly into the floor before securing it with screws․ Proper alignment is critical; double-check that the window frame sits flush against adjacent wall panels․ This careful attention to detail will prevent future issues and ensure a weatherproof seal, maximizing the window’s effectiveness․
Securing Wall Panels to the Floor
Properly anchoring the wall panels to the floor is fundamental for a stable and durable shed structure․ Begin by carefully aligning each panel with the floor frame, ensuring a snug fit against adjacent panels․ Utilize all provided screws – typically four to five per panel – to create a robust connection․ Prioritize even distribution of screws for balanced support and to prevent warping or shifting․
Maintain consistent panel alignment throughout this process․ Regularly check that the top edges of the wall panels remain level, using a straight edge if necessary․ This is crucial for ensuring the roof trusses will sit correctly later on․ Remember the entire structure flexes, so gentle adjustments may be needed as you progress․ Tighten screws gradually, avoiding overtightening, which can strip the holes and compromise the panel’s integrity․ A methodical approach yields the best results․
Connecting Wall Panels to Each Other
Once the wall panels are secured to the floor, the next critical step is joining them together to form a cohesive structure․ This involves carefully aligning the edges of adjacent panels and utilizing the provided screws to create a strong, interlocking connection․ Begin with the front right corner, proceeding around the perimeter back to the door on the left front․ This order, if unchanged from the standard design, simplifies the process․
Ensure each panel “snaps” fully into the adjacent one, engaging all four to five screw points․ Pay close attention to maintaining a square and even alignment as you work, constantly checking for any gaps or misalignments․ Remember to work slowly and deliberately, as forcing the panels can damage the plastic․ The structure will feel unstable initially, but it will gain rigidity as more panels are connected․ A second person is invaluable during this phase for support and alignment․

Phase 4: Roof Installation – The Most Challenging Part
Roof installation demands precision; trusses should overhang walls by less than half an inch․ Expect stripped holes, flexing, and frustration – a second person is essential for success․
Preparing the Roof Trusses
Before tackling roof installation, meticulous preparation of the trusses is paramount․ Lay out all roof trusses, ensuring you understand their orientation – typically, they’re identical, but double-check․ The key is to position them so they extend slightly beyond the walls, ideally less than half an inch, as this facilitates squaring up the structure during installation․
Remember the entire shed flexes considerably until the roof is secured, so this slight overhang allows for adjustments․ Inspect each truss for any damage incurred during shipping or handling․ While minor imperfections might be acceptable, significant damage necessitates contacting Lifetime for replacements․
Having a helper at this stage is incredibly beneficial, as trusses can be unwieldy․ Pre-staging the trusses along the sides of the shed, in the order they’ll be installed, streamlines the process and minimizes wasted movement․ This proactive approach sets the stage for a smoother, less frustrating roof installation experience․
Positioning the Roof Trusses
Carefully lifting and positioning the roof trusses is a critical step demanding precision and teamwork․ Begin by placing the first truss, ensuring that slight overhang – less than half an inch – is maintained on both sides․ Work systematically, either from left to right or right to left, depending on your dominant hand, maintaining consistent spacing between each truss․
As you position each truss, resist the urge to immediately secure it․ Instead, focus on getting all trusses in place first, allowing for adjustments․ This is where the structure begins to “true up,” meaning the walls will start to square themselves as the roof takes shape․ Expect flexing and movement; this is normal․
A second person is invaluable here, providing support and helping to align the trusses․ Remember, the goal is to create a stable framework before permanently fastening anything․ This initial positioning is the foundation for a structurally sound shed roof․
Truing Up the Structure & Corner Tightening
Once all roof trusses are positioned, the real work begins: “truing up” the structure․ This involves actively manipulating the shed to achieve squareness and tightness in the corners․ Expect resistance; the shed will flex and fight you every step of the way․ This is where patience and a second person become absolutely essential․
Push, pull, twist, and prod the walls and trusses until everything aligns as closely as possible․ As you force the structure into alignment, you’ll notice the corners begin to tighten․ This is a positive sign, indicating that the shed is gaining structural integrity․ Don’t be afraid to use your body weight to apply leverage․
Remember, stripped holes and frustration are common during this phase․ It’s a challenging process, but the reward is a solid, well-built shed․ Continue adjusting until the structure feels stable and square before proceeding to secure the trusses․
Dealing with Stripped Holes & Flexing
Inevitably, you will strip holes during Lifetime shed assembly, particularly during roof installation․ The plastic is prone to it, so avoid overtightening screws – practice with a hand driver or a very slow drill speed․ Flexing is also constant; the entire structure moves until the roof is secured․ Don’t panic! This is normal․
For stripped holes, try using slightly larger screws, or insert a small piece of wood (like a toothpick) into the hole before re-screwing․ This provides a bit more grip․ Remember the shed’s inherent flexibility; it requires constant adjustment as you work․
A second person is invaluable here, as one can apply pressure to align panels while the other secures them․ Expect to “fight” the shed, slap it in frustration, and question your purchase․ It’s a common experience, but perseverance pays off!

Final Steps & Considerations
Completing assembly involves door installation, hinge cup alignment, and cotter pin securing․ Remember panel warmth impacts flexibility, and avoid overtightening screws for longevity․
Door Installation: Hinge Cups & Cotter Pins
Door installation requires careful attention to the hinge cup placement and proper cotter pin securing․ Begin by installing the bottom cups for the door hinge rods, strategically planning ahead for the cotter pins – shims under the cups during floor laying can ensure sufficient height for pin insertion․ Remember to remove these shims before attaching the gables to the front corners․
This proactive approach simplifies the process․ The cotter pins themselves demand foresight; their proper installation is crucial for door functionality and security․ Don’t rush this step! It’s a common area for frustration if not addressed correctly․ Ensure the door swings smoothly and aligns properly within the frame after hinge and pin installation․ A second person is invaluable during this phase, assisting with alignment and support․
Importance of a Second Person During Assembly
A second person is not merely helpful; it’s practically essential for a successful Lifetime shed assembly․ The sheer size and flexibility of the panels necessitate assistance, particularly during roof installation․ While working alone is possible, it dramatically increases the difficulty and frustration levels․ Having a helper allows for accurate alignment of trusses, crucial for “truing up” the structure and tightening corners․
They can support panels while you secure them, preventing flexing and stripping of screw holes – a common issue․ The roof, in particular, benefits from a second set of hands to manage the trusses and ensure they overhang the walls by less than half an inch․ This collaborative effort minimizes errors, speeds up the process, and reduces the likelihood of questioning your purchase decision!
Panel Warmth & Flexibility – Finding the Balance
Achieving successful assembly relies heavily on the temperature and pliability of the shed panels․ They need to be warm enough to be flexible, allowing them to bend and snap into place, but not so soft that they lose their structural integrity․ This is a “stupid balance,” as one assembler put it, requiring careful observation and timing․ Cold panels are brittle and prone to cracking, while overly warm panels become floppy and difficult to align․
The ideal scenario involves working on a day with moderate temperatures, or strategically warming the panels with gentle heat․ Remember, the entire process involves twisting, poking, and prodding each panel to ensure a square fit․ This delicate dance between flexibility and rigidity is key to avoiding stripped holes and a frustrating build experience․
Avoiding Overtightening Screws
A critical aspect of Lifetime shed assembly is resisting the urge to overtighten screws․ The plastic components are susceptible to stripping if excessive force is applied, leading to weakened connections and potential structural issues․ Experienced assemblers strongly recommend practicing screw insertion by hand or utilizing a compact drill set to a very low torque setting․
Proceed slowly and deliberately, ensuring each screw is snug but not forcefully compressed․ Remember the entire structure flexes and moves during assembly, and overtightening can exacerbate this, creating additional stress on the panels and connections․ A second person is invaluable for holding panels in alignment while screws are secured, minimizing strain and preventing damage․ Patience and a gentle touch are paramount for a successful and durable shed build․

Troubleshooting Common Assembly Issues
Lifetime shed assembly frequently presents challenges, particularly during roof installation․ Stripped screw holes are almost inevitable – don’t panic! Often, slightly larger screws or strategically placed wood shims can provide a secure fix․ Flexing and misalignment are also common; remember the structure is unstable until the roof is installed․
Persistent issues often stem from panels not being “warm” and pliable enough․ Gentle warming can aid alignment․ A second person is crucial for applying pressure and holding panels square while you work․ Don’t hesitate to “twist and poke and prod” the panels into position․ If you find yourself questioning the entire process, take a break! It’s a frustrating build, but perseverance, combined with a gentle approach, will ultimately yield a functional shed․