Polaroid Snap Manual: A Comprehensive Guide
Welcome! This comprehensive guide details the Polaroid Snap Instant Print Digital Camera. It covers setup, operating instructions, troubleshooting, and more, ensuring optimal use of your device.
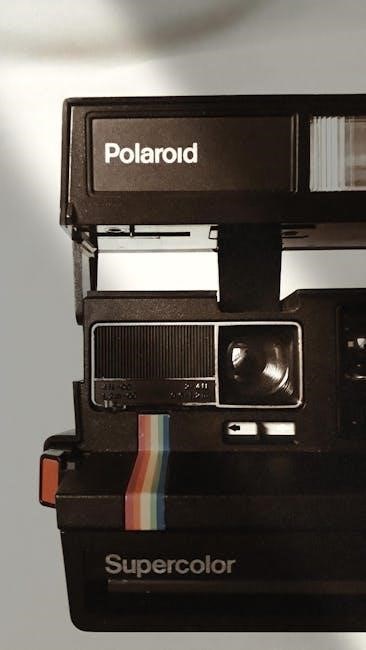
The Polaroid Snap Instant Print Digital Camera represents a delightful blend of classic instant photography with modern digital convenience. This compact and user-friendly camera allows you to capture and instantly print vibrant, full-color photos – no ink required! It’s designed for spontaneous moments, creative expression, and sharing memories in a tangible way.
Unlike traditional Polaroid cameras that rely on chemical processes, the Snap utilizes ZINK (Zero Ink) technology. This innovative system embeds cyan, magenta, yellow, and clear dye crystals within the special ZINK paper. Heat activates these crystals, producing a high-quality, durable print. This eliminates the need for messy ink cartridges and ensures a clean, hassle-free printing experience.
This manual serves as your complete resource for understanding and maximizing the capabilities of your Polaroid Snap. Whether you’re a seasoned photographer or a first-time user, you’ll find detailed instructions and helpful tips to guide you through every step, from initial setup to advanced features. Get ready to rediscover the joy of instant photography!
Unboxing and Package Contents
Congratulations on purchasing your Polaroid Snap Instant Print Digital Camera! Let’s verify you have all the components. Carefully open the box and ensure the following items are present. A quick visual inspection will confirm everything is accounted for before you begin.
Inside the box, you should find: Polaroid Snap Touch Instant Print Camera itself. 2. A Micro USB cable – used for charging the camera and transferring photos to a computer. 3. A User guide & warranty information booklet, providing detailed instructions and important safety information. You may also find sample ZINK paper, though a full pack is recommended for extended use.
Carefully remove all packaging materials. Inspect the camera for any visible damage that may have occurred during shipping. If you notice any defects, immediately contact customer support. Retain the original packaging for potential returns or warranty claims. Familiarize yourself with each component before proceeding to the next setup stage. Proper unboxing ensures a smooth start to your instant photography journey!
Camera Overview: Buttons and Ports
Let’s familiarize ourselves with the Polaroid Snap’s physical features. The camera boasts a streamlined design with intuitive controls. On the top panel, you’ll find the Shutter button – press to capture photos. Adjacent to it is the Power button, used for turning the camera on and off. A dedicated Print button initiates immediate photo printing.
Around the camera’s body, locate the Micro USB port. This port serves a dual purpose: charging the internal battery and connecting to a computer for photo transfer. A small slot houses the SD card, essential for expanding storage capacity. The ZINK paper loading compartment is located at the back, allowing easy paper insertion.
The camera’s front features the lens and flash. The built-in flash provides additional illumination in low-light conditions. Understanding the location and function of each button and port is crucial for efficient operation. Refer to the diagram in the user guide for a visual representation of these components. Proper knowledge ensures seamless control over your Polaroid Snap.
Initial Setup and Charging
Before your first use, ensure the Polaroid Snap is fully charged. Connect the included Micro USB cable to the camera’s Micro USB port and a powered USB source – a computer or a USB wall adapter. A charging indicator light will illuminate, typically red, signifying the charging process is underway.
Allow several hours for a complete charge. The indicator light will change, usually to green, when charging is complete. Avoid using the camera while it’s charging to ensure optimal battery health. Initial charging is vital for maximizing battery performance and longevity.
Once charged, insert a formatted SD card (see the section on SD cards). Power on the camera using the Power button. The camera will automatically detect the SD card and prepare for operation. The Polaroid Snap Touch is initially set to still photo capture by default. Familiarize yourself with the basic operating procedures before proceeding. Refer to the user guide for detailed instructions.
Inserting and Formatting SD Cards
The Polaroid Snap utilizes SD cards for storing captured photos. Locate the SD card slot on the camera – consult the ‘Camera Overview’ section for its precise location. Gently insert a compatible SD card into the slot until it clicks into place. Do not force the card.
Upon initial use, or if the camera displays an error message regarding the SD card, formatting is recommended. Navigate to the camera’s settings menu using the control buttons. Select the ‘Format SD Card’ option. Important: Formatting will erase all data on the card, so back up any existing photos beforehand.
Follow the on-screen prompts to complete the formatting process. The camera will prepare the SD card for optimal performance. Ensure the card is securely inserted after formatting. Using a compatible SD card is crucial for proper camera operation. Refer to the user guide for supported SD card types and capacities. Remove the card following the provided instructions.
Powering On/Off and Basic Operations
To power on your Polaroid Snap, press and hold the power button – its location is detailed in the ‘Camera Overview’ section. The camera will initiate, and the display screen will illuminate. To power off, repeat this process; press and hold the power button until the screen goes dark.
Basic operation involves navigating the camera’s menu using the directional buttons. These buttons allow you to cycle through camera modes, adjust settings, and review captured photos. The shutter button initiates photo capture. A single press will take a still photograph.
The camera defaults to still photo capture upon startup. Refer to the ‘Understanding the Camera Modes’ section for details on switching between modes. During extended use, the camera may become warm to the touch; this is normal operating behavior. Always follow the instructions in the user guide for safe and effective use. Familiarize yourself with the button layout for seamless control.
Understanding the Camera Modes
The Polaroid Snap Touch offers versatile shooting modes accessible via the mode button. By default, the camera is set to still photo capture, allowing for immediate printing. However, you can switch to video mode to record short clips, offering dynamic content creation options.
Self-timer mode, detailed elsewhere in this user guide, provides a convenient way to include yourself in photos. Explore the menu settings to customize the timer duration. The camera also features a creative mode, enabling filters and effects to enhance your images before printing.

Navigating between modes is straightforward using the directional buttons. The display screen clearly indicates the currently selected mode. Remember to consult the ‘Taking Still Photos’ and ‘Using the Flash Function’ sections for mode-specific instructions. Proper understanding of these modes unlocks the full potential of your Polaroid Snap camera, ensuring optimal results for every shot.
Taking Still Photos with the Polaroid Snap
To capture a still photo, ensure the camera is in photo mode – indicated on the display. Frame your subject using the viewfinder or the LCD screen. Press the large, central shutter button halfway to activate autofocus; a green square confirms focus lock.
Press the shutter button fully to take the picture. The image will instantly be available for review on the screen. You can then choose to print the photo immediately using the dedicated print button, or save it to the SD card for later use.
Adjusting settings like brightness and contrast, found within the camera’s menu, can enhance image quality. Remember to consider lighting conditions; the flash function, detailed in a separate section, can be invaluable in low-light environments. Refer to the ‘Adjusting Camera Settings’ section for further customization options. Experiment with different angles and compositions to unleash your creativity!
Adjusting Camera Settings
Access the camera settings by pressing the ‘Menu’ button. Navigate using the directional buttons to explore various options. You can adjust image quality, selecting between different resolutions for still photos. Date and time settings are crucial for accurate photo timestamps; ensure these are correctly configured.

The ‘Polaroid Snap’ allows for adjustments to brightness and contrast, influencing the overall look of your images. Explore the scene modes, optimized for specific shooting conditions like ‘Outdoor’ or ‘Indoor’; You can also enable or disable sound effects for shutter clicks and menu navigation.
Language settings allow personalization, while the ‘Auto Power-Off’ feature conserves battery life. Remember to ‘Save’ any changes made before exiting the menu. Refer to the user guide for detailed explanations of each setting and its impact on image capture. Experiment to find the optimal settings for your shooting style!
Using the Flash Function
The Polaroid Snap features a built-in flash to enhance image brightness in low-light conditions. To activate or deactivate the flash, access the camera’s menu using the ‘Menu’ button. Navigate to the flash settings using the directional buttons. You’ll typically find options for ‘Auto’, ‘On’, and ‘Off’.
‘Auto’ mode allows the camera to automatically determine when flash is needed, based on ambient light levels. ‘On’ forces the flash to fire with every shot, useful in consistently dark environments. ‘Off’ disables the flash, preserving battery life and avoiding unwanted flash effects in well-lit situations.
Be mindful that flash can sometimes cause red-eye in photos. Experiment with different flash settings and subject positioning to minimize this effect. The flash range is limited, so subjects closer to the camera will receive more intense illumination. Remember to save your chosen flash setting before exiting the menu.
Self-Timer Mode Explained
The Polaroid Snap’s self-timer function allows you to include yourself in photos, perfect for group shots or capturing moments from a distance. To activate self-timer mode, press the ‘Mode’ button repeatedly until you reach the self-timer icon on the camera’s display. The icon typically resembles a clock or a person icon with a timer.
Once activated, a countdown timer will appear on the screen, usually set to 10 seconds by default. This gives you time to position yourself in the frame. Some models may offer multiple timer settings, such as 2 or 5 seconds, accessible through the camera’s menu.
To take the photo, press the shutter button after the timer has started. The camera will automatically capture the image after the designated countdown. Ensure the camera is stable during the countdown to avoid blurry photos. To deactivate the self-timer, simply switch to a different camera mode.
Printing Photos: A Step-by-Step Guide
Printing with your Polaroid Snap is simple! First, ensure ZINK paper is loaded correctly (see the ‘Loading ZINK Paper’ section). After capturing a photo, the camera will typically ask if you want to print it immediately. Select ‘Print’ using the mode button or shutter button to confirm.
If automatic printing is disabled, navigate to the image in review mode. Then, press and hold the shutter button for a few seconds to initiate the printing process. The camera will then eject the photo, which develops automatically – no ink needed!
The printing process takes approximately 30-60 seconds. Avoid touching the photo as it emerges, as the ZINK technology requires time to fully develop the image. If the photo doesn’t print, check the paper supply and ensure the camera isn’t in a mode that prevents printing. Refer to the troubleshooting section for further assistance.
Loading ZINK Paper
To load ZINK paper into your Polaroid Snap, locate the paper compartment, usually on the side or bottom of the camera. Gently open the compartment door. Ensure the camera is powered off before loading to prevent errors.
ZINK paper comes in a special cartridge. Insert the cartridge into the compartment, ensuring it clicks securely into place. The glossy side of the paper should face upwards; Do not force the cartridge; if it doesn’t slide in easily, check for obstructions or ensure it’s oriented correctly.
The camera automatically detects the presence of ZINK paper. A paper icon on the display will indicate the remaining sheet count. Avoid exposing the ZINK paper to direct sunlight or extreme temperatures, as this can affect print quality. Always use genuine Polaroid ZINK paper for optimal results and to avoid damaging the camera.
Troubleshooting Printing Issues
If your Polaroid Snap isn’t printing, first ensure ZINK paper is loaded correctly and that the paper cartridge clicks securely into place. Check the display for a low paper indicator; if it’s empty, reload. A common issue is paper jams – gently open the paper compartment and remove any stuck paper fragments, avoiding tearing.

If prints are faded or have incorrect colors, verify you’re using genuine Polaroid ZINK paper. Expired or improperly stored paper can also cause issues. Try restarting the camera; this often resolves minor software glitches. Ensure the camera isn’t overheating during extended use, as this can affect print quality.
For persistent problems, check the SD card for sufficient space. A full card can prevent printing. If issues continue, consult the Polaroid support website for further assistance or consider a factory reset (refer to the manual for instructions).
Understanding ZINK Technology
The Polaroid Snap utilizes Zero Ink (ZINK) printing technology, a revolutionary process that eliminates the need for traditional ink cartridges. Instead of ink, ZINK paper contains embedded dye crystals that activate when heated by the camera’s thermal print head. This creates full-color, durable images directly on the paper.
ZINK paper is specially designed with a protective overcoat layer, making prints resistant to water and smudging. The embedded dye crystals react to heat, forming the colors you see in your prints. This technology simplifies the printing process, reducing mess and maintenance.
It’s crucial to use genuine Polaroid ZINK paper for optimal results. Non-Polaroid ZINK paper may not produce the same quality or durability. The ZINK process is also environmentally friendly, as it reduces plastic waste associated with ink cartridges. Proper storage of ZINK paper, away from heat and humidity, is essential for maintaining its quality.
Managing Printed Photos
Your Polaroid Snap prints are designed for instant enjoyment and sharing! The ZINK paper produces durable, smudge-proof photos, but proper handling ensures longevity. Avoid prolonged exposure to direct sunlight, which can cause fading over time. Gently handle prints by the edges to prevent fingerprints and smudging, even though they are protected.
Get creative with your prints! Use stickers, washi tape, or photo albums to display and preserve your memories. The compact size of the prints makes them ideal for decorating lockers, scrapbooks, or creating personalized gifts. Consider laminating prints for added protection against wear and tear, especially for frequently handled photos.
For digital backups, remember the original images are stored on the SD card. Regularly transfer these files to your computer or cloud storage to safeguard against data loss. This allows you to reprint favorites or share them digitally. Enjoy the tactile experience of instant prints alongside the convenience of digital archiving!
Connecting to a Computer via USB
To transfer photos from your Polaroid Snap to a computer, use the included Micro USB cable. Ensure your computer is powered on and has a functioning USB port. Connect the smaller end of the USB cable to the port on your Polaroid Snap camera, typically located on the side or bottom. Connect the larger USB end to an available port on your computer.
Your computer should automatically detect the camera as a removable storage device, similar to a USB flash drive. If it doesn’t, check your device manager (Windows) or system information (Mac) to ensure the camera is recognized. You may need to install drivers, though this is usually automatic.
Once recognized, open your file explorer (Windows) or Finder (Mac) to access the camera’s storage. Locate the DCIM folder, which contains your photos and videos. You can then copy and paste or drag and drop the desired files to a folder on your computer. Safely eject the camera from your computer before disconnecting the USB cable to prevent data corruption.
Downloading and Using the Polaroid Snap App
Enhance your Polaroid Snap experience by downloading the Polaroid Snap app, available for both iOS and Android devices. Search for “Polaroid Snap” in the App Store (iOS) or Google Play Store (Android) and install the application. Once installed, launch the app and follow the on-screen instructions to pair your camera via Bluetooth.
The app allows for remote camera control, enabling you to frame and capture photos directly from your smartphone or tablet. You can also view, edit, and share your photos directly from the app. Explore features like filters, stickers, and creative borders to personalize your images.
The app also facilitates firmware updates for your Polaroid Snap, ensuring optimal performance and access to the latest features. Regularly check the app for available updates. Through the app, you can manage your ZINK paper levels and access helpful tips and support resources. It’s a central hub for maximizing your Polaroid Snap’s capabilities.
Software Updates and Firmware
Maintaining up-to-date software and firmware is crucial for optimal Polaroid Snap performance and access to the newest features. The Polaroid Snap app is the primary method for receiving and installing these updates. Regularly check the app for notifications regarding available firmware updates.
Before initiating an update, ensure your camera has sufficient battery life – a minimum of 50% is recommended – and remains connected to a stable power source throughout the process. The update process typically takes several minutes; avoid interrupting it to prevent potential issues.
Firmware updates often include bug fixes, performance enhancements, and compatibility improvements. These updates ensure seamless operation and compatibility with the Polaroid Snap app and ZINK paper. Ignoring updates may lead to reduced functionality or unexpected errors. The app guides you through each step, providing clear instructions. Following these steps guarantees a smooth and successful update experience, keeping your Polaroid Snap functioning at its best.
Battery Life and Power Management
The Polaroid Snap utilizes a rechargeable lithium-ion battery. Battery life varies depending on usage patterns, including frequency of photo capture and printing. During extended use, the camera may feel warm – this is normal operation and doesn’t indicate a defect.
To maximize battery life, avoid prolonged use in extreme temperatures. Fully charge the battery before initial use and when it’s been stored for extended periods. When charging, use the provided Micro USB cable and a compatible power adapter. Avoid using the camera while it’s charging, as this can impact battery health.

The camera automatically enters sleep mode after a period of inactivity to conserve power. To check the battery level, access the settings menu on the camera display. Proper battery management ensures consistent performance and extends the lifespan of your Polaroid Snap. Regularly cycling the battery (charging and discharging) helps maintain its capacity over time.
Camera Maintenance and Cleaning
To ensure the longevity and optimal performance of your Polaroid Snap, regular maintenance and careful cleaning are essential. Always power off the camera and disconnect any connected cables before cleaning.
The camera body should be cleaned with a soft, dry cloth. Avoid using abrasive cleaners, solvents, or excessive moisture, as these can damage the finish. For stubborn smudges, lightly dampen the cloth with water and gently wipe the surface. The lens should be cleaned with a specialized lens cleaning cloth or a microfiber cloth to remove fingerprints and dust.
Inspect the ZINK paper tray regularly for any paper debris. Ensure the paper loading area is free from obstructions. Avoid exposing the camera to extreme temperatures, humidity, or direct sunlight for extended periods. Store the camera in a clean, dry place when not in use. Proper care will help maintain the quality and functionality of your Polaroid Snap for years to come.

Safety Precautions and Warnings
Please read and understand all safety precautions before operating your Polaroid Snap camera. This equipment generates radio frequency energy and, if not used correctly, may cause interference. To avoid potential harm, always follow the provided instructions carefully.
Do not disassemble or attempt to repair the camera yourself. This will void the warranty and could result in electric shock or injury. Keep the camera away from water and other liquids to prevent damage. Avoid dropping or subjecting the camera to strong impacts, as this can cause internal damage.
During extended use, the camera may become warm to the touch – this is normal. However, if it becomes excessively hot, discontinue use and allow it to cool down. Ensure proper ventilation around the camera during operation. This device is not intended for use by children without adult supervision. Always use approved accessories and power adapters.
Frequently Asked Questions (FAQ)
Q: Does this printer print pictures from other devices? A: No, the Polaroid Snap is designed to print only photos taken directly with its built-in camera. It doesn’t support printing from smartphones or other cameras.
Q: How many sheets of ZINK paper can I load at once? A: The Polaroid Snap can hold up to 10 sheets of ZINK paper in the paper compartment. Avoid overfilling to prevent paper jams.
Q: What do I do if my photos are printing with incorrect colors? A: Ensure you are using genuine Polaroid ZINK paper. Also, check the camera settings and adjust the brightness or contrast if needed. If the issue persists, try restarting the camera.
Q: Where can I find the full user guide and warranty information? A: A detailed user guide, including instructions, is available online and often included with the product. Warranty details are also accessible through the official Polaroid website.
Warranty Information and Support
Polaroid Snap cameras are covered by a limited warranty against defects in materials and workmanship. The standard warranty period is typically one year from the date of original purchase. Please retain your proof of purchase for warranty claims.
This warranty does not cover damage resulting from misuse, accidents, unauthorized modifications, or normal wear and tear. For detailed warranty terms and conditions, please refer to the official Polaroid website or the user guide included with your camera.
For technical support, troubleshooting assistance, or to submit a warranty claim, visit the Polaroid customer support website. You can also find helpful FAQs and instructions online. Contact information for customer service, including phone numbers and email addresses, is readily available on their support pages.
Polaroid also offers a community forum where users can share tips, ask questions, and find solutions to common issues. Remember to register your product online to receive updates and exclusive offers.