
Everchill Refrigerator Manual: A Comprehensive Guide
Welcome! This manual provides detailed instructions for optimal Everchill refrigerator performance, covering installation, operation, maintenance, and troubleshooting for various models.
It addresses common issues like cooling problems, frost buildup, and 12V power connections, ensuring your refrigerator functions efficiently on the road or at home.
Everchill refrigerators, manufactured by Furrion, are specifically designed for the demands of recreational vehicle (RV) living, though suitable for various applications. These 12V DC powered refrigerators offer a reliable cooling solution without requiring traditional AC power sources, making them ideal for off-grid adventures.
Everchill models prioritize energy efficiency and durability, utilizing advanced compressor technology and robust construction. Understanding the unique features of your Everchill unit is crucial for maximizing its performance and longevity. This manual will guide you through the specifics of operation, maintenance, and troubleshooting, ensuring a consistently cool and convenient experience. Proper care, as outlined within, will prevent common issues and extend the life of your refrigerator.
Understanding Your Everchill Model
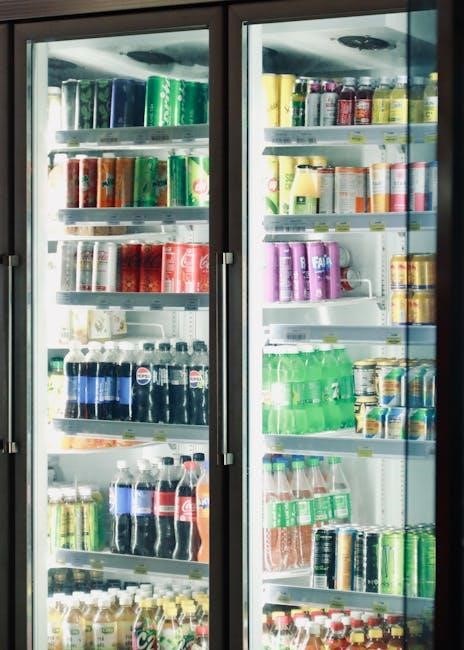
Everchill refrigerators come in various sizes and configurations, each tailored to different RV layouts and cooling needs. Familiarize yourself with the specific features of your model, including the interior layout, shelving options, and control panel functions. Locate the model number and serial number – typically found on a sticker inside the refrigerator compartment – for future reference and warranty claims.
Understanding the airflow system is vital; blocked vents can lead to uneven cooling or troubleshooting headaches. Note the location of the condenser coils and ensure they remain unobstructed. Knowing these details will help you diagnose potential issues, like frost buildup or temperature inconsistencies, and maintain optimal performance. Refer to the technical specifications section for detailed dimensions and power consumption information.
Safety Precautions
Important Safety Instructions: Before operating your Everchill refrigerator, carefully read and understand these precautions. Disconnect the 12V DC power supply before cleaning or performing any maintenance to avoid electrical shock. Never attempt to repair refrigerant leaks yourself; contact qualified service personnel.
Ensure proper ventilation around the refrigerator to prevent overheating and maintain efficient cooling. Do not store flammable materials inside the unit. Avoid overloading the refrigerator, as this can impede airflow and compromise cooling performance, potentially leading to troubleshooting needs. Keep the door seals clean to maintain a tight seal and prevent energy loss. Always follow these guidelines to ensure safe and reliable operation.
Installation and Setup
Proper installation is crucial for Everchill refrigerator performance. Ensure adequate ventilation, secure the 12V DC connection, and follow the initial startup procedure carefully.

Proper Ventilation Requirements
Maintaining adequate ventilation is paramount for your Everchill refrigerator’s efficient operation and longevity. Restricted airflow significantly impacts cooling performance and can lead to premature component failure. Everchill refrigerators require sufficient space around the unit to dissipate heat effectively.
Specifically, allow a minimum of 2 inches of clearance on all sides – top, back, and both sides. Avoid obstructing the ventilation openings with items like curtains, clothing, or other objects. Proper airflow ensures the condenser coils can release heat, maintaining optimal internal temperatures.
Insufficient ventilation can cause the refrigerator to work harder, consuming more power and potentially leading to overheating. Regularly inspect the area around the refrigerator to confirm ventilation pathways remain unobstructed, guaranteeing consistent and reliable cooling.
Connecting to Power (12V DC)
Connecting your Everchill refrigerator to a 12V DC power source requires careful attention to ensure safe and reliable operation. Always use appropriately sized wiring – typically 16 AWG or larger – to handle the refrigerator’s current draw. A dedicated circuit is highly recommended to prevent voltage drops that can affect performance.
Before connecting, verify the polarity of the wiring; incorrect polarity can damage the refrigerator’s internal components. Connect the positive (+) wire to the refrigerator’s positive terminal and the negative (-) wire to the negative terminal. Ensure a secure and corrosion-free connection at both the refrigerator and the power source.
Regularly check the battery voltage to confirm it remains within the acceptable range for optimal operation. A fully charged battery is crucial for consistent cooling.
Initial Startup Procedure
Upon initial connection to a 12V DC power source, allow the Everchill refrigerator several hours to reach its optimal operating temperature. Avoid repeatedly opening the door during this stabilization period, as it hinders efficient cooling. Initially, set the thermostat to a mid-range setting and monitor the temperature.
Observe the temperature setting light; a solid light indicates the compressor is running. If the light flashes, it may signal a low voltage issue or a temperature sensor problem – check your power connection and battery voltage.
Allow at least 24 hours for the refrigerator to fully cool down before loading with food. Proper initial setup ensures peak performance and longevity.

Operating Your Everchill Refrigerator
Efficient operation involves understanding temperature controls, adjusting thermostat levels, and strategically organizing the interior for optimal airflow and food preservation.
Temperature Control Settings
Understanding the thermostat is crucial for maintaining ideal food storage temperatures within your Everchill refrigerator. The control panel allows for precise adjustments, typically ranging from warmer settings for minimal cooling to colder settings for maximum preservation.
A flashing temperature setting light often indicates a potential issue, requiring immediate attention. Experiment with different levels to find the sweet spot that balances energy consumption and food safety. Remember, external factors like ambient temperature and door opening frequency can influence internal temperatures.
Regularly monitor the refrigerator’s performance and adjust settings accordingly. A colder setting may be necessary during hot weather or when storing a large quantity of warm items. Prioritize food safety by ensuring consistent cooling.
Adjusting Thermostat Levels
Fine-tuning your Everchill refrigerator’s temperature begins with understanding the thermostat dial or digital controls. Start by selecting a mid-range setting and allowing 24 hours for the refrigerator to stabilize. If the refrigerator isn’t cold enough, incrementally increase the setting towards a colder level.
Conversely, if excessive frost develops or items are freezing, reduce the setting towards a warmer level. Monitor the internal temperature with a separate thermometer to verify accuracy. Remember, adjustments should be made gradually to avoid drastic temperature swings.
A flashing light on the temperature setting often signals a problem; consult the troubleshooting section. Consistent monitoring and small adjustments are key to optimal performance.
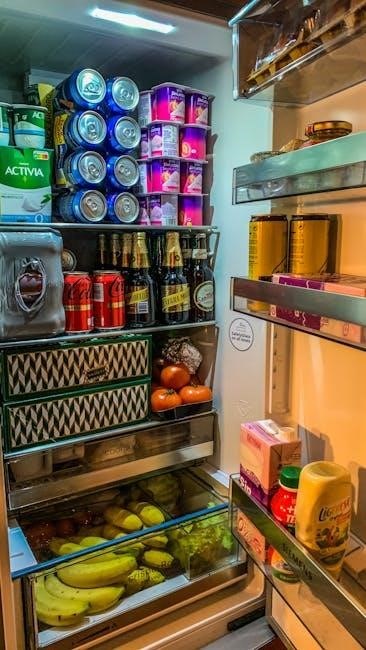
Interior Organization and Storage Tips
Maximize space and efficiency within your Everchill refrigerator by utilizing proper organization techniques. Store frequently used items at eye level for easy access. Utilize adjustable shelves to accommodate various container sizes. Keep raw meats on the lowest shelf to prevent cross-contamination;
Proper airflow is crucial; avoid overpacking, which can restrict circulation and reduce cooling performance. Use airtight containers to preserve freshness and prevent odors from mingling. Regularly check expiration dates and discard spoiled items promptly.
Consider using shelf liners for easy cleaning. Remember, a well-organized refrigerator maintains optimal temperature and minimizes food waste, contributing to long-term efficiency.

Maintenance and Cleaning
Regular upkeep ensures peak performance! This section details cleaning schedules, defrosting procedures, and condenser coil maintenance for your Everchill refrigerator.
Consistent cleaning prevents odors and maintains efficient cooling, extending the lifespan of your appliance.
Regular Cleaning Schedule
Maintaining a consistent cleaning schedule is crucial for optimal Everchill refrigerator performance and longevity. We recommend a quick wipe-down of interior surfaces weekly, using a mild detergent and warm water solution. Pay close attention to spills and food residue, as these can cause odors and attract pests.
A more thorough cleaning should be performed monthly. Remove all shelves and drawers, washing them separately with soap and water. Clean the interior walls and door seals, ensuring no grime remains. Don’t forget to wipe down the exterior surfaces with a damp cloth.
Annually, a deep clean including the condenser coils is advised (see dedicated section). This prevents dust buildup, improving cooling efficiency. Remember to always disconnect power before any extensive cleaning!
Defrosting Procedures
Frost buildup within your Everchill refrigerator can significantly reduce cooling efficiency and airflow. Manual defrosting is necessary when excessive frost accumulates, particularly in the freezer compartment. Begin by disconnecting the refrigerator from the 12V power source. Remove all food items and store them appropriately.
Leave the refrigerator door open to allow the frost to melt naturally. You can accelerate the process by placing bowls of warm water inside, but avoid using sharp objects to scrape away the ice, as this can damage the interior surfaces.
Once all the frost has melted, thoroughly dry the interior with a clean cloth before reconnecting the power and returning the food. Regular defrosting prevents ice buildup and maintains optimal performance.
Cleaning the Condenser Coils
Maintaining clean condenser coils is crucial for efficient heat dissipation and optimal refrigerator performance. Located on the back or bottom of the unit, these coils can accumulate dust and debris, hindering cooling capabilities. Always disconnect the refrigerator from the 12V power source before cleaning.
Use a vacuum cleaner with a brush attachment to gently remove dust and dirt from the coils. Avoid bending or damaging the delicate fins. For stubborn debris, a soft brush can be used cautiously.
Regular cleaning – ideally every six months – ensures proper airflow and prevents the refrigerator from working harder than necessary, extending its lifespan and reducing energy consumption.
Troubleshooting Common Issues
Facing problems? This section details solutions for typical Everchill refrigerator malfunctions, including cooling failures, temperature light alerts, and power connection difficulties.
Refrigerator Not Cooling
If your Everchill refrigerator isn’t cooling, begin by verifying the 12V DC power connection and ensuring the battery is fully charged; a weak battery significantly impacts performance.
Next, adjust the temperature setting to a colder level to see if that initiates cooling. Confirm the refrigerator door is sealing correctly, preventing warm air infiltration. Inspect the condenser coils for dust accumulation, as this hinders heat dissipation.

A flashing temperature setting light often indicates a sensor issue or low voltage. Check for airflow obstructions within the refrigerator and freezer compartments. If the freezer operates but the refrigerator doesn’t, a blocked air channel is likely. Consider a potential defrost issue if ice buildup is present.
Freezer Working, Refrigerator Not Cooling
When the freezer functions correctly, but the refrigerator section remains warm, the primary suspect is often a blocked airflow channel between the two compartments. Everchill refrigerators rely on a fan to circulate cold air.
Inspect the vents connecting the freezer and refrigerator; ensure they aren’t obstructed by food items or ice buildup. Check the back panels within both sections for excessive ice accumulation, indicating a potential defrost system malfunction.
A faulty damper control, regulating airflow, could also be the cause. Verify the evaporator coil isn’t heavily frosted, suggesting refrigerant or airflow problems. Ensure proper ventilation around the refrigerator unit itself, as restricted airflow impacts overall cooling efficiency.
Temperature Setting Light Flashing
A flashing temperature setting light on your Everchill refrigerator indicates a potential issue with the internal temperature sensor or the control board. This signals the unit isn’t maintaining the set temperature effectively, potentially due to a sensor malfunction or communication error.
First, attempt to adjust the temperature setting to a colder level and observe if the flashing persists. Check the 12V power connection and battery voltage, ensuring a stable power supply. If the issue continues, it may require further investigation of the control board or sensor.
Consider a reset of the unit, and if problems remain, professional service is recommended to diagnose and resolve the underlying cause.
Excessive Frost Buildup
Significant frost accumulation within your Everchill refrigerator suggests a problem with the defrost system. This could stem from a faulty defrost heater, a malfunctioning defrost timer, or a blocked defrost drain. Excessive frost restricts airflow, diminishing cooling efficiency and potentially damaging the compressor.
Inspect the back panels of both the refrigerator and freezer compartments for ice buildup, indicating a defrost issue. Ensure the defrost drain isn’t clogged, allowing condensate to flow freely. If the problem persists, a professional technician should examine the defrost heater and timer for proper operation.
Regular defrosting, as outlined in the maintenance section, can help prevent this issue.
12V Power Connection and Battery Issues
Proper 12V DC power is crucial for your Everchill refrigerator’s operation. Begin by verifying a secure connection at the power source and the refrigerator terminals. A low battery voltage is a frequent cause of performance problems; ensure your battery is fully charged and in good condition.
Use a voltmeter to check the battery voltage while the refrigerator is running – it should remain above 11.5V DC. Consider a dedicated battery for the refrigerator to prevent draining the vehicle’s starting battery. Inspect the wiring for corrosion or damage, replacing any faulty components.
Consistent voltage drops indicate a potential issue with the wiring or battery itself.
Diagnosing Airflow Problems
Restricted airflow significantly impacts cooling efficiency in your Everchill refrigerator. Begin by checking for obstructions blocking the vents inside both the refrigerator and freezer compartments. Ensure items aren’t packed too tightly against the back panel, hindering air circulation.
Inspect the back panels for excessive ice buildup, as this blocks crucial air channels. A defrost cycle may be needed to resolve this. Feel for airflow at the vents – a lack of noticeable air movement indicates a blockage or fan malfunction.
Confirm the evaporator fan is operating correctly; listen for its sound. Proper airflow is vital for even temperature distribution.

Advanced Troubleshooting
For complex issues, inspect the evaporator coil for frost and identify potential refrigerant problems. Check back panels for ice buildup, indicating defrost failures.
Checking the Evaporator Coil
Accessing the evaporator coil requires careful disassembly, often involving removing interior panels within the freezer compartment. Always disconnect power before beginning this process to prevent electrical shock. Once accessible, visually inspect the coil for excessive frost buildup. A light coating of frost is normal, but significant accumulation indicates a potential issue with the defrost system or airflow.
Feel the coil – it should be cold to the touch. If sections are warm, this suggests a refrigerant circulation problem. Carefully examine the coil for any physical damage, such as kinks or leaks. If you suspect a refrigerant leak, do not attempt to repair it yourself; contact a qualified technician. Remember, handling refrigerants requires specialized training and equipment.
Proper airflow across the evaporator coil is crucial for efficient cooling. Ensure there are no obstructions blocking the fan or vents leading to the coil.
Identifying Refrigerant Issues
Suspecting a refrigerant issue requires caution, as handling these substances is best left to professionals. Signs include consistently poor cooling performance despite a functioning compressor and fan, or a noticeable lack of cold air even at the lowest temperature setting. A hissing sound near the compressor could indicate a leak, but isn’t always audible.
Visual inspection for oil residue around connections and the compressor itself can suggest a leak point. However, confirming a refrigerant problem definitively requires specialized tools like a manifold gauge set to measure system pressures. Do not attempt to measure pressures yourself without proper training.
Low refrigerant levels often stem from leaks, but compressor failure can also contribute. Addressing refrigerant issues necessitates a qualified technician to locate and repair the leak, evacuate the system, and recharge it with the correct refrigerant type.
Inspecting Back Panels for Ice Buildup
Regularly inspect the back panels within both the refrigerator and freezer compartments for excessive ice accumulation. This buildup often signals a defrost system malfunction, blocking crucial airflow channels and hindering cooling efficiency. Accessing these panels usually involves removing interior shelves and drawers – consult your model’s specific layout.
Significant ice formation indicates the defrost heater may be failing, the defrost timer isn’t cycling correctly, or the defrost thermostat isn’t activating. Carefully remove any ice with a plastic scraper, avoiding sharp objects that could damage the evaporator coils.
Addressing the root cause requires diagnosing and repairing the faulty defrost component. Ignoring ice buildup leads to reduced cooling capacity and potential compressor strain. A professional technician is recommended for complex repairs.
Technical Specifications
This section details key specifications including dimensions, weight, power consumption (in watts and amps), and the type of refrigerant used in your Everchill refrigerator.
Dimensions and Weight
Understanding the physical characteristics of your Everchill refrigerator is crucial for proper installation and ensuring it fits seamlessly within your RV or designated space. Dimensions vary significantly between models, so referencing your specific model number is essential.
Generally, Everchill refrigerators are designed with space-saving configurations. Typical heights range from 30 to 35 inches, widths from 18 to 24 inches, and depths from 20 to 26 inches. However, these are approximate values.
Weight also differs based on size and features. Smaller models may weigh around 70-80 pounds, while larger capacity units can exceed 100 pounds. Always consult the product label or detailed specifications sheet for precise measurements and weight to facilitate safe handling and installation.
Power Consumption
Efficient energy use is a key benefit of Everchill refrigerators, particularly for RV applications. These units are designed to operate effectively on 12V DC power, minimizing strain on your battery system. Average power consumption typically ranges from 60 to 120 watts, depending on the model size, ambient temperature, and usage patterns.
Lower power consumption is achieved through optimized insulation and compressor technology. Monitoring power draw is recommended to assess battery life and solar charging needs. Consider factors like frequent door openings and temperature settings, as these impact energy usage.
Refer to your specific model’s technical specifications for precise power consumption data, ensuring optimal performance and battery management during your travels.
Refrigerant Type
Everchill refrigerators utilize R134a refrigerant, a hydrofluorocarbon (HFC) commonly used in cooling systems. This refrigerant is selected for its efficiency and compatibility with the refrigerator’s components, ensuring reliable cooling performance. It’s crucial to understand that servicing the refrigerant system requires specialized training and equipment.
Important safety note: Attempting to repair or recharge the refrigerant system yourself can be dangerous and may void your warranty. Any refrigerant leaks or suspected issues should be addressed by a qualified technician.
Proper handling of R134a is essential for environmental responsibility. Always follow local regulations regarding refrigerant disposal and recycling when servicing or decommissioning your Everchill refrigerator.

Warranty Information
Everchill refrigerators are backed by a limited warranty covering defects in materials and workmanship. Review the included warranty card for specific coverage details and claim procedures.
Coverage Details
The Everchill warranty typically covers defects in materials and workmanship under normal use for a specified period, often one year from the original purchase date. This coverage extends to components like the compressor, evaporator, condenser, and electronic controls;
However, the warranty does not cover damage resulting from misuse, abuse, improper installation, accidents, or unauthorized repairs. Cosmetic damage, normal wear and tear, and issues caused by power surges are also excluded.
Furthermore, the warranty is void if the refrigerator is used for commercial purposes or subjected to conditions outside of its designed operating parameters. Maintaining proof of purchase is crucial for any warranty claim.
Claim Procedures
To initiate a warranty claim, contact Everchill Support with your original proof of purchase, model number, and a detailed description of the issue. You may be required to provide photos or videos documenting the defect.
Everchill will then assess the claim and, if approved, authorize a repair or replacement. Authorized service centers will handle the repair work, or Everchill may request the return of the defective unit for inspection.
Shipping costs for returning the refrigerator may be the responsibility of the customer, depending on the terms of the warranty. Keep all documentation related to the claim, including repair orders and shipping receipts, for your records.
Contacting Everchill Support
For assistance with your Everchill refrigerator, our dedicated support team is available to address your questions and concerns. You can reach us through several convenient channels.
Email support is available at [insert Everchill support email address here], and we strive to respond to all inquiries within 24-48 business hours. Alternatively, you can call our toll-free hotline at [insert Everchill phone number here] during our operating hours, Monday through Friday, 9 AM to 5 PM EST.
Visit our website at [insert Everchill website address here] for frequently asked questions, troubleshooting guides, and downloadable resources. We are committed to providing excellent customer service and ensuring your satisfaction.